This is part of 'Lustrous Learnings', a series of posts about Lustrous Spirit which is a game I've spent the last four years making. Lustrous Learnings focuses on game development concepts I've stumbled into which aren't often discussed.
Highlight Shaders
If you've ever dealt with probes, screen space jank, or ugly highlights, you probably know that reflections and highlights in games kinda suck. They're limited approximations of the ways that light rays bounce, and render engines don't usually give you much control over them.
Today I'd like to talk about how I've achieved custom highlights in my game Lustrous Spirit.
All these highlights are fake 😱
How highlights work
For a highlight to appear, light has to emit from a light source, bounce off of a reflective object, and then hit the camera. This means that the appearance of highlights depends on:
a) the position of the light source(s)
b) the geometry of whatever object the light is bouncing off of
c) the position of the camera
The reflecting object's material also affects the appearance of highlights - rough materials scatter light more which blurs highlights, and metallic materials reflect in a mirrorlike fashion.
So yeah there are a lot of factors at play. Any one of these changing seriously affects how highlights appear. So controlling how highlights appear is a constant battle... unless you hack your own highlights in! Let's see how you can create beautiful fake highlights which will look how you want no matter the lighting.
Reflection textures
Basically we're gonna fake our highlights by adding glowy spots through the material's emissive output, which isn't 'realistic' but who cares it looks fine.
The key to fake highlights are reflection coordinates. Reflection coordinates are the normalized (x,y,z) direction that a ray fired from the camera's view would bounce off once it hits some geometry. If you make a material that's just the reflection coordinates, you'll get a feel for how they work - as you look at the material from different angles, the coordinates move around just like how reflections/highlights do.
Some render engines give you reflection coordinates directly, but if you wanna calculate them yourself then you do reflect(cam direction, normal) - documentation on reflect.
You can use reflection coordinates to drive any texture in your shader to make it look like a reflection! Since the reflection vector has three dimensions (x,y,z) and texture coordinates are 2D you'll need to throw away one of the reflection coord channels. I usually throw away the Z channel which makes reflections behave a little weird but it's not a big deal.
Reflection coords + a noise texture for spots
Super shiny metal
One of the simplest applications of fake highlights is making metal appear shiny regardless of lighting conditions - anyone who's drawn metal knows you've gotta include some nice highlights for it to look good. This fake highlight trick helped my mercury puddles in Lustrous Spirit stand out.
Basically just take any texture you like, drive its UVs with the reflection coords, and output it through the emissive channel. For metals in particular I like to use a 3D cubemap texture instead of a regular 2D texture so that I can use all 3 reflection coord channels - eliminating a bit of jank for more mirrorlike highlights.
In Lustrous Spirit I have an outdoors scene capture probe that captures a cubemap every 5 seconds. The cubemap is then used for the mercury's fake highlight texture. This way the mercury reflects brightly even if it's shadowed or indoors, and it will reflect light appropriately based on time of day. This is similar to using a reflection probe, but instead you can choose a different area of your scene as the source of reflections (and control the intensity/color/whatever of your reflections).
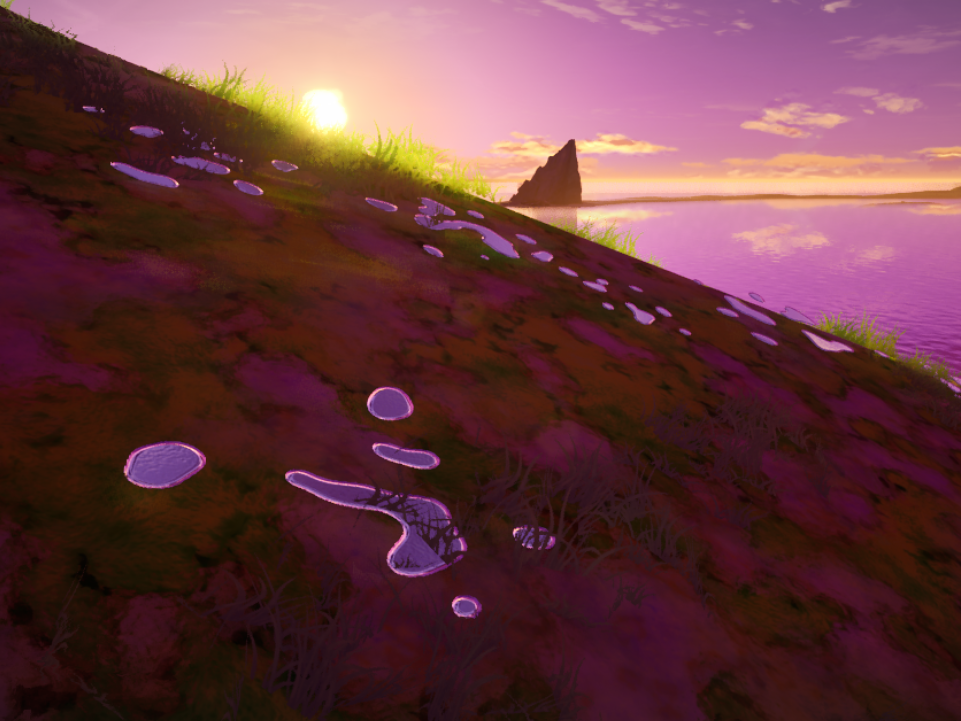
Mercury with highlights
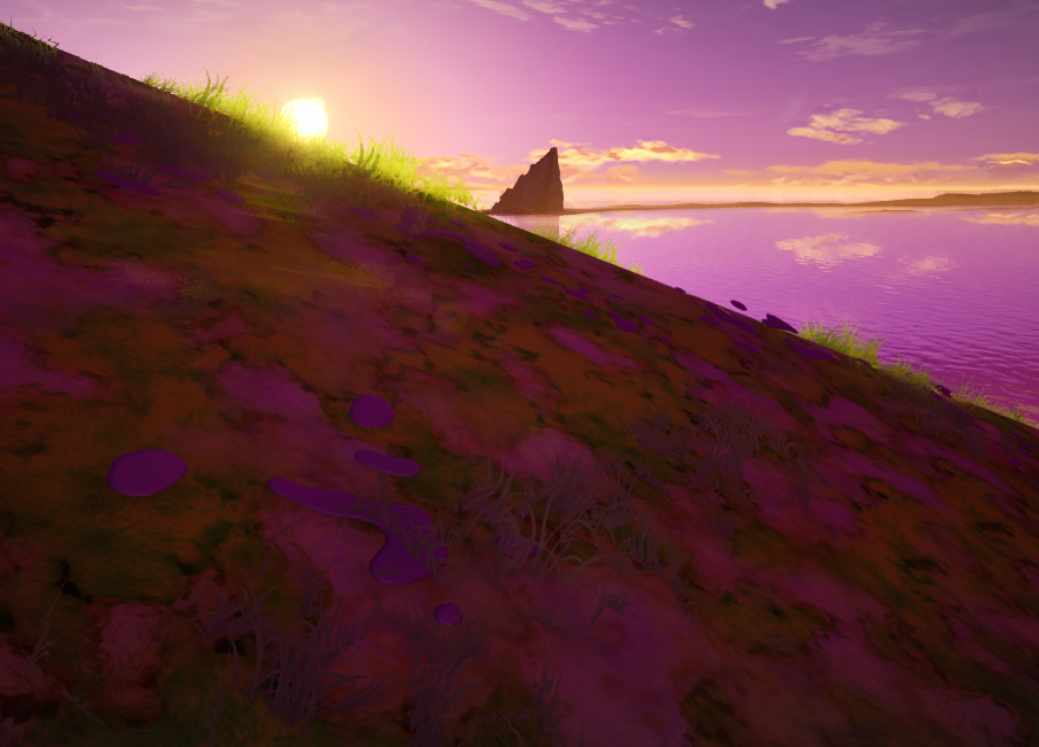
Mercury without highlights... you can barely see it!
Random highlight tips
It's easy to use normal maps to affect your fake highlights, just plug your normal map into the reflect node/function.
Use softer edged textures if you want the material to seem rougher, sharper highlights will make an object seem smoother.
Multiple layers of fake highlights can emulate layered materials like clearcoats (objects coated in plastic), which is normally only possible in layered material renderers.
Fake depth, refraction, and holographics
Besides shiny-ifying, I wanted to add some other effects to my gemstones. Gemstones can have lots of interesting qualities like refraction, diffraction, and even imperfections like bubbles beneath the surface. I noticed all of these details change based on reflection angle, but not quite as quickly as highlights.
I figured out that, to slow the movement of highlights down, you can drive the highlight texture with a mix of reflection coordinates and some other coordinate. For example to add bubbles underneath a gemstone's surface, I drive a bubble texture with a blend of a little bit of reflection vector, but mostly the normal vector. This way they appear to move around a bit as your view of the gem changes, like they are hovering below the refractive gem's surface.
In the case of these below-the-surface details, the greater the reflection coordinates' influence, the deeper they will appear to be. I use this to create multiple layers of bubbles by sampling the bubble texture 3 times with different levels of reflection influence.
Layered bubbles
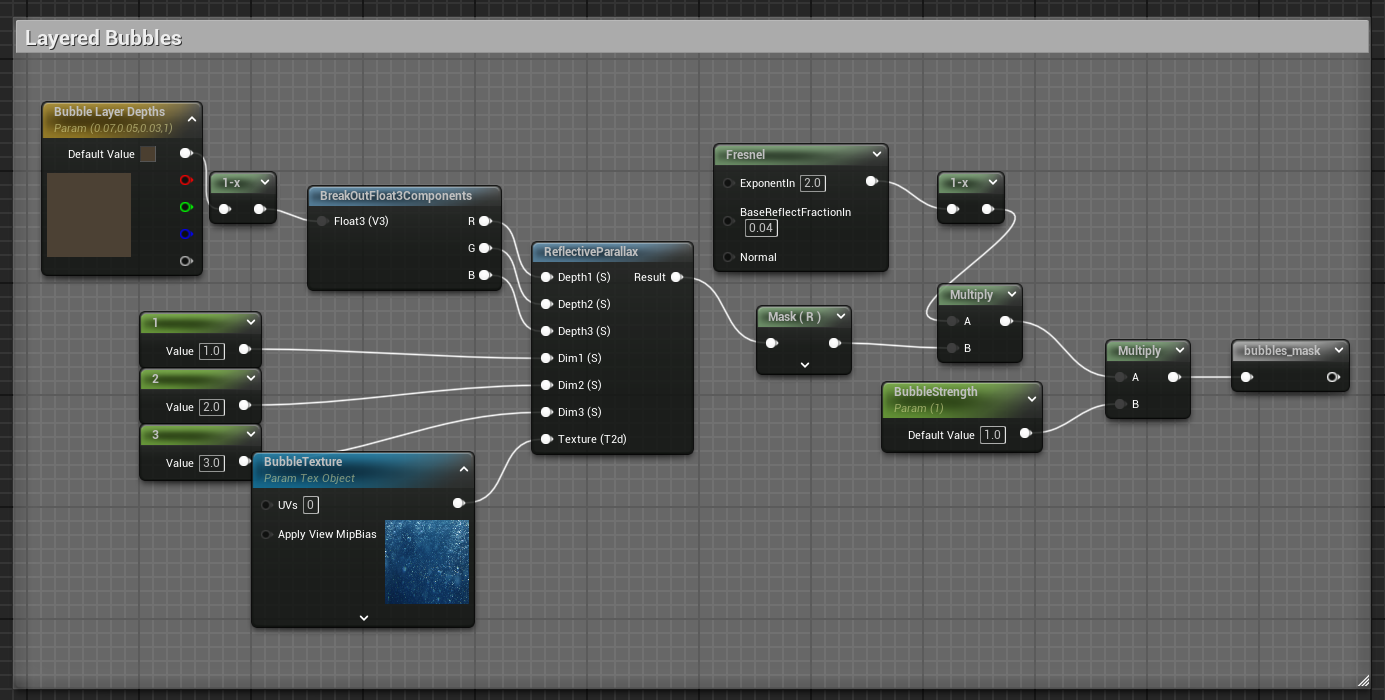
Layered bubble shader graph
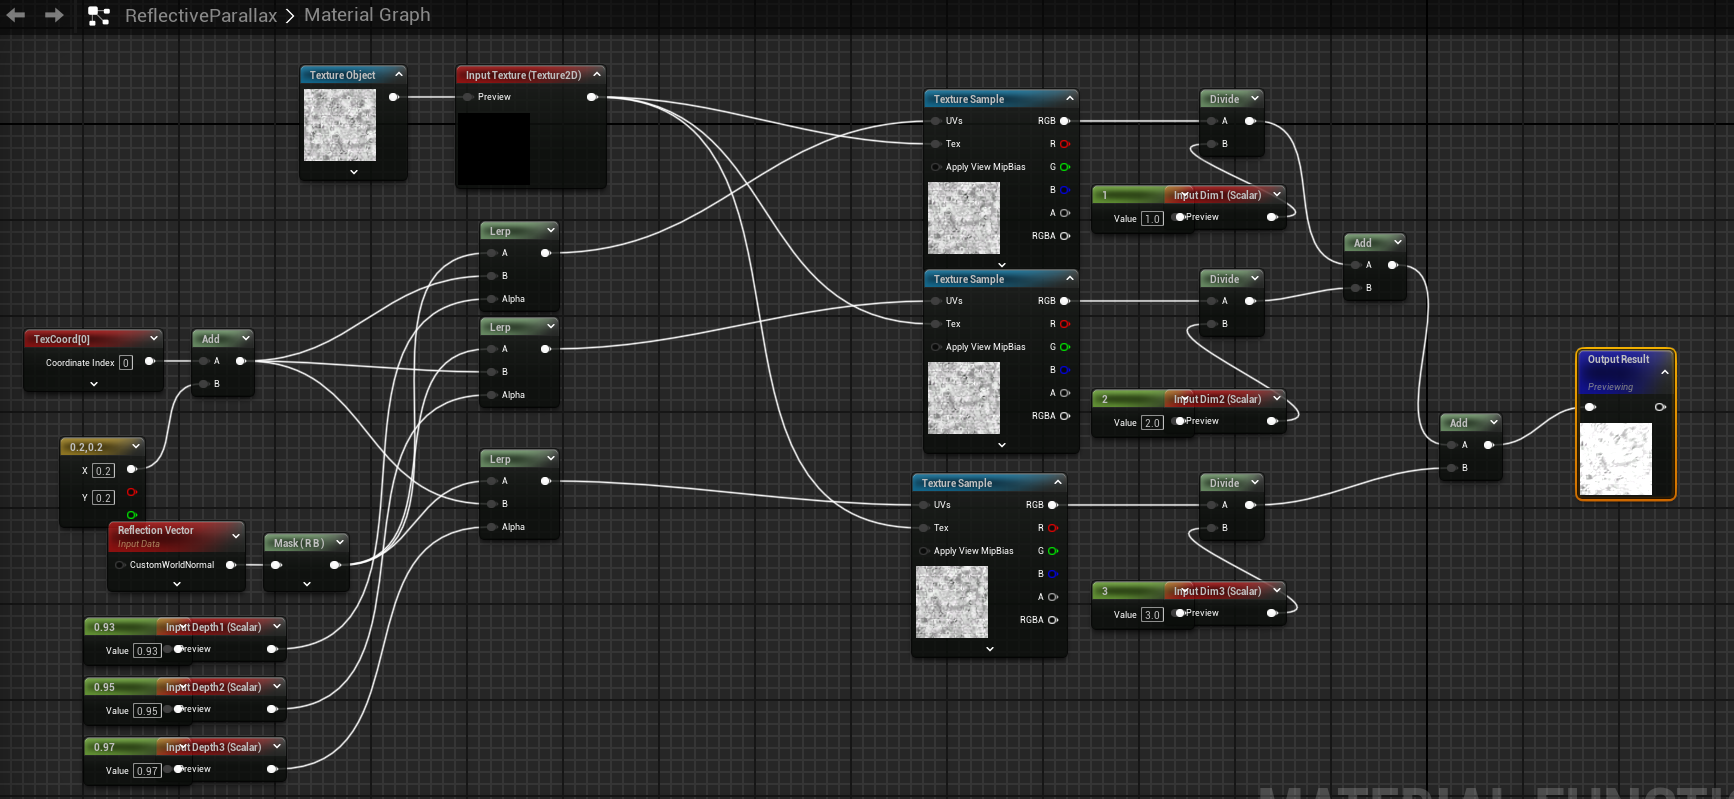
Reflective parallax function
Another application of slowing down highlights is creating holographic effects - holographic highlights move slower across objects than standard specular highlights.
Holographics shift around a little but less than the highlights
I find this technique quite interesting because seeing details moving beneath the surface gives objects a sense of depth and physicality which is rare considering that 3D meshes are just empty shells.
Conclusion
Go out there and control your highlights! Highlights hold a lot of artistic value and can imply things like smoothness, roughness, wetness, etc about a material. I've hardly seen anyone use reflection coordinates even though it's super easy to use and the results are great. Although fake highlights won't match your scene's lighting, which is especially apparent in scenes with varying lighting, fake highlights usually look good anyway.
Thanks for reading!
If you have any questions or comments, email me or message on discord - andrewdunne.gamedev@gmail.com | @oatvercast (discord).
Thanks to TeaWithCthulu for feedback on this post.